 |
|||
|
|
|||
|
|
|||
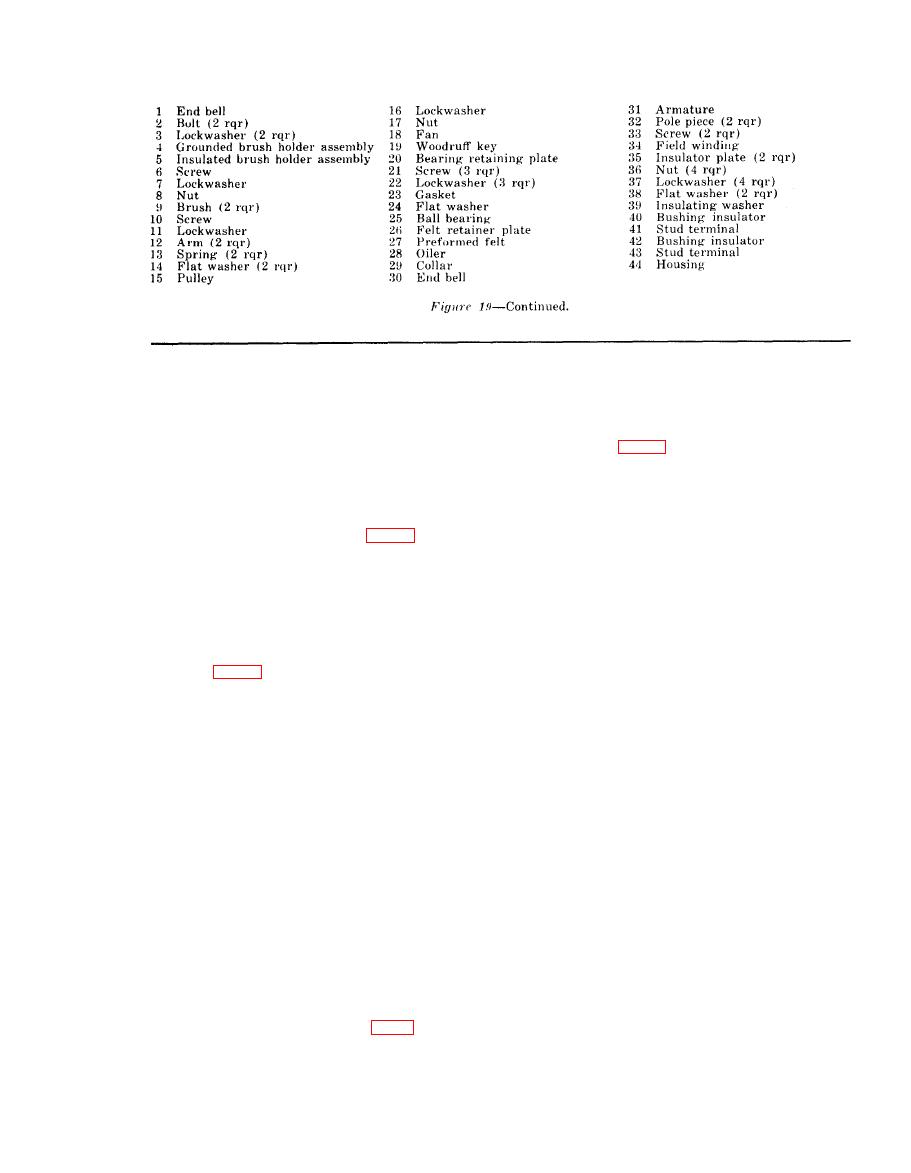
| ||||||||||
|
|
 (2) D i s c o n n e c t the electrical cable from
holder with the lockwasher (11) and
the starter.
s c r e w (10).
(3) Remove two hex nuts and lockwashers
(7) I n s t a l l the other brush in a similar
that secure the starter support bracket
manner.
(21, fig. 20) to the crankcase.
(8) Position the end bell (1) on the hous-
(4) Remove the three bolts and lockwash-
i n g (44) and secure with the two
ers that secure the starter in the fly-
lockwashers (3) and bolts (2).
wheel shroud and remove the starter.
g.
Reassembly.
(5) R e m o v e t h e s c r e w ( 2 2 ) a n d f l a t
(1) Mount the fan (18, fig. 19) and the
washer (36) that secures the support
pulley (15) on the shaft of the arma-
b r a c k e t to the end bell (24) and re-
ture (31).
move the bracket from the starter.
( 2 ) Install the lockwasher (16) and hex
b. Cleaning and Inspection.
n u t (17) on the armature shaft.
(1) Clean the external surfaces of the
h. Installation.
starter with a cloth dampened in an
(1) Connect the leads of the shield box (1,
a p p r o v e d cleaning solvent and dry
thoroughly. Clean corrosion from the
accessory generator (9) in accordance
electrical terminal of the starter.
w i t h tags attached during removal.
(2) Inspect the terminal of the starter for
Place shield box on the generator and
c o r r o s i o n and damaged threads.
s e c u r e with the lockwasher (3) and
(3) R e m o v e the brush access cover and
s c r e w (2).
inspect the starter internally for dam-
(2) P o s i t i o n the generator on the gener-
age. Inspect the brushes for oil soaked
a t o r mounting plate (20) and secure
c o n d i t i o n and excessive wear. If the
with the two flat washers (13), lock-
brushes are less than half their orig-
washers (12), and bolts (11).
inal length replace the brushes as di-
(3) Install the belt on the pulleys and ad-
rected in c below. Refer a defective
just the belt as prescribed in a a b o v e .
starter to depot maintenance for over-
haul.
(4) Connect the 2 shielded cables to the `2
e l e c t r i c a l plug connectors (4) in ac-
c. Brush Replacement.
c o r d a n c e with tags attached during
(1) Lift the four brushes (28 and 29) out
removal.
of the brush holders.
(2) R e m o v e the four screws (25) and
lockwashers (26) that secure the end
a. Removal.
bell (24) to the housing assembly (35)
and remove the end bell.
(1) Remove the battery (par. 9).
AGO 5742A
|
|
Privacy Statement - Press Release - Copyright Information. - Contact Us |
