|
| |
TM 9-5130-338-12&P
4-17. HYDRAULIC IMPACT WRENCH REPAIR-Continued.
c.
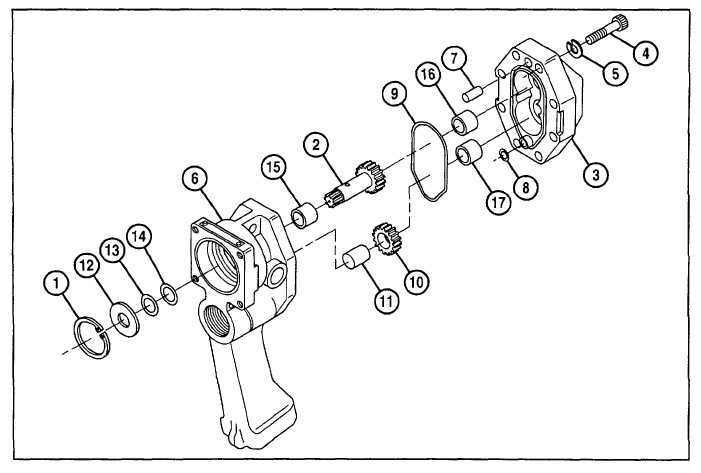
Assembly.
1.
Position main housing (6) in vise with soft-jaw caps, motor side facing up.
2.
Install bushing (15) in main housing (6) and two bushings (16 and 17) in motor cap (3).
3.
Lubricate and install two new preformed packings (8 and 9) with clean lubricating oil.
4.
Install dowel pin (7) in motor cap (3).
5.
Install idler shaft (11), idler gear (10), and main shaft (2) in main housing (6).
6.
Install and secure motor cap (3) to main housing (6) with eight capscrews (4) and eight new lockwashers
(5). Torque capscrews to 384 lb-in. (43.4 N•m).
7.
Position main housing (6) facing upward.
8.
Lubricate new round preformed packing (14) and new flat preformed packing (13) with clean lubricating oil.
9.
Install new round preformed packing (14), new flat preformed packing (13), backup washer (12), and new
snapring (1) on main shaft (2).
d.
Testing. Perform motor test procedure (see para. 4-21) after completing all follow-on maintenance.
4-18
|