 |
|||
|
|
|||
|
Page Title:
Section III. STRUCTURAL MEMBERS |
|
||
| ||||||||||
|
|
 TM 55-1730-202-14
Figure 5-Continued.
Section Ill. STRUCTURAL MEMBERS
c. Cleaning, Inspection, and Repair.
(1) Clean all parts in cleaning solvent (Fed-
a. R e m o v a l . R e m o v e t h e c l a m p a s s e m b l y a n d
eral
Specification
P-D-680)
and
dry
thorough-
the
pump
assembly
39).
ly.
b. Disassembly.
(2)
Inspect
all
part
for
cracks,
breaks,
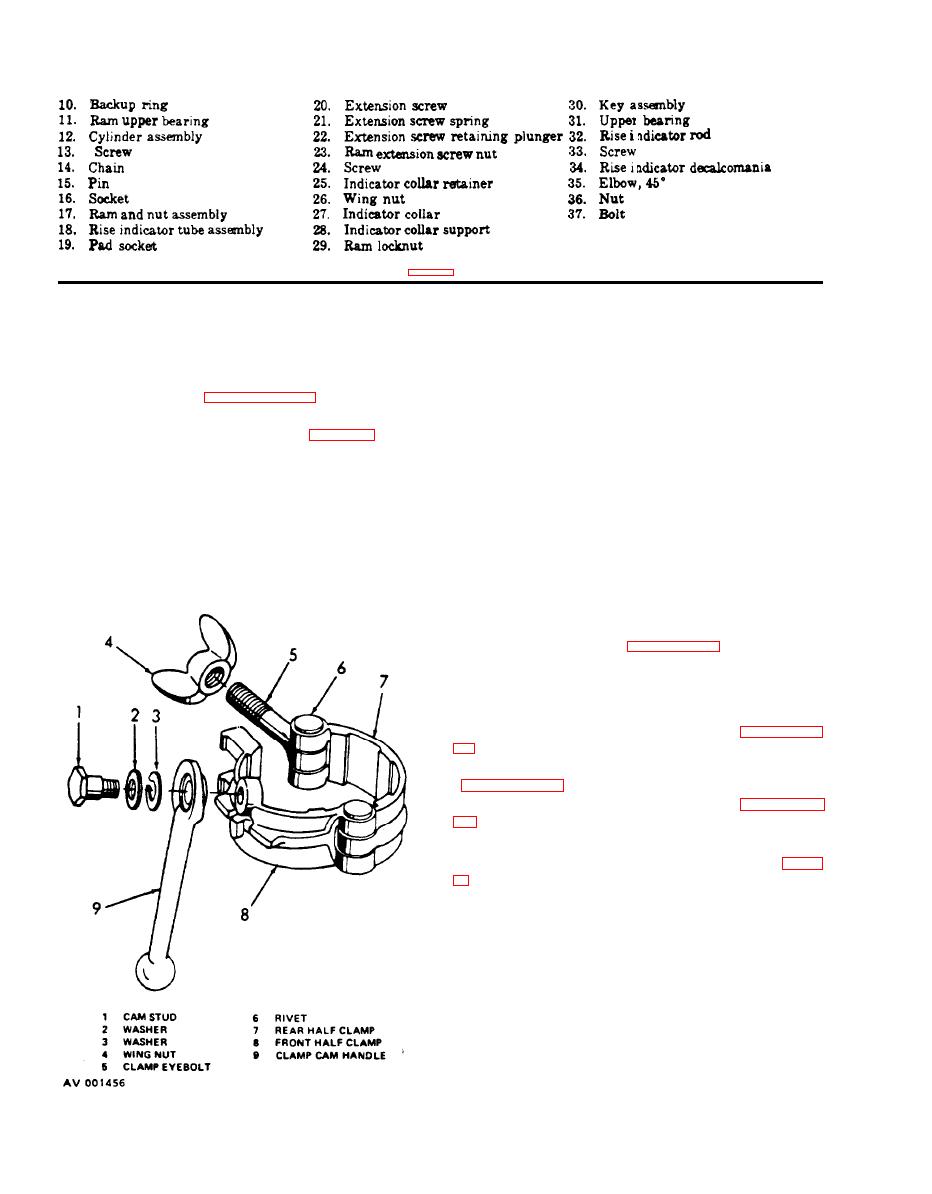
(1) Remove the cam stud (1, figure 6), two
distortion, and damaged threads. Remove nicks
washers (2 and 3), and the clamp cam (9) from
and
burrs
from
threads
and
straighten
distorted
the front half clamp (8).
parts. Replace any part damaged beyond repair.
(2)
Remove
the
wingnut
(4)
from
the
d. Reassembly.
clamp
eyebolt
(5).
Remove
the
two
rivets
(6)
(1) Install two new rivets (6) if removed
only
if
necessary
to
replace
defective
rear
half
during disassembly. Install
the
wingnut
(4)
on
clamp
(7),
front
half
clamp
(8),
or
clamp
eye-
the clamp eyebolt (5).
bolt (5).
(2) Install the clamp cam (9), two washers
(2
and 3), and the cam stud (1) on tie front
half
clamp
(8).
e. Installation. InstalI the pump assembly and
the clamp assembly (paragraph 39).
52. TRIPOD ASSEMBLY.
a.
Removal
(1) Remove the pump assembly (paragraph
(2)
Remove
the
cylinder
and
ram
assembly
(3)
Remove
the
foot
assemblies
b.
Disassembly.
(1) Remove the nine nuts (6 and 9, figure
six bolts (3), and three studs (10) that
secure the six no. 1 braces (2), six no. 2 braces
(5), six no. 3 braces (7), and six links (8) to
the leg extension (4) and remove the braces and
links.
(2) Pull the six leg extensions off the three
legs (1).
c.
Cleaning,
Inspection, and
Repair.
with
cleaning
solvent
(1) Clean all parts
P-D-680)
and
dry
(Federal Specification
thoroughly.
(2) Inspect the legs, leg
extensions,
braces,
and
links
for
cracks,
breaks,
and
distortion.
Figure 6. Clamp Assembly, Exploded View.
Straighten
bent
or
distorted
items
and
repair
|
|
Privacy Statement - Press Release - Copyright Information. - Contact Us |
